Finding the best soundproof foam is crucial for any space where sound control is needed. Whether it’s a recording studio, home theater, or office, the right foam can make a big difference.
Soundproof foam helps to reduce noise by absorbing sound waves. This can improve audio quality and create a quieter environment. With so many options available, it can be hard to choose the right one. In this guide, we will explore the best soundproof foam options.
We will look at their features, benefits, and how they can meet your needs. Get ready to learn about the top choices that can help you achieve the best soundproofing for your space.
Types Of Soundproof Foam
Soundproof foam comes in various shapes and designs. Each type serves a unique purpose in controlling noise and improving sound quality. Understanding these types will help you choose the right foam for your space.
Wedge Foam
Wedge foam is one of the most popular types of soundproof foam. Its design features a series of wedge-like projections. This shape helps to trap sound waves and reduce echo. Wedge foam is perfect for recording studios and home theaters. It is easy to install and highly effective.
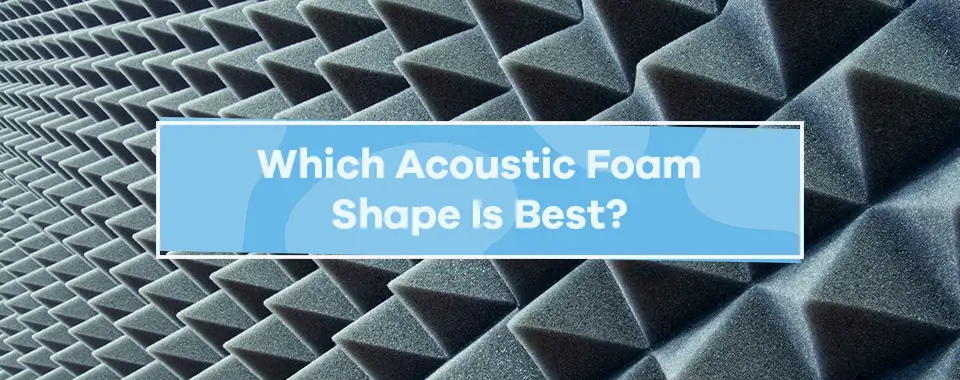
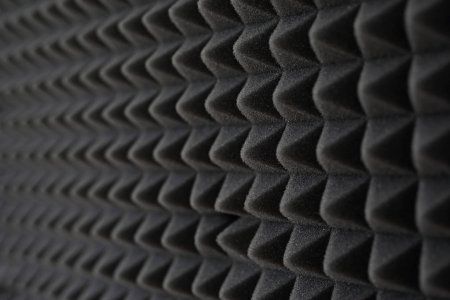
Pyramid Foam
Pyramid foam has a distinctive pyramid shape. The points of the pyramids scatter sound waves. This reduces echo and improves sound clarity. Pyramid foam works well in various settings, such as offices and studios. It also adds an interesting visual element to the room.
Egg Crate Foam
Egg crate foam resembles the shape of an egg carton. It is excellent for reducing noise and controlling sound reflections. This type of foam is lightweight and easy to install. It is often used in music practice rooms and vocal booths. Egg crate foam is also budget-friendly.
Bass Traps
Bass traps are designed to absorb low-frequency sound waves. They are essential for achieving balanced sound in a room. Bass traps are usually placed in corners where bass tends to build up. They are ideal for recording studios and home theaters. Bass traps help create a clear and accurate sound environment.

Credit: www.soundassured.com
Choosing The Right Foam
Selecting the best soundproof foam can greatly improve the acoustics of your space. The right foam can reduce noise effectively and enhance audio quality. Consider several factors before making your decision.
Room Size Considerations
The size of your room impacts the type of foam you need. Large rooms require thicker foam to absorb sound effectively. For small rooms, thinner foam usually suffices. Measure your room’s dimensions to determine the appropriate thickness and quantity of foam panels.
Here is a quick guide:
| Room Size | Foam Thickness | Number of Panels |
|---|---|---|
| Small (up to 100 sq ft) | 1-2 inches | 10-20 |
| Medium (100-300 sq ft) | 2-3 inches | 20-40 |
| Large (300+ sq ft) | 3-4 inches | 40+ |
Frequency Of Noise
Different foams are designed to absorb different noise frequencies. Low-frequency sounds, like bass, need thicker and denser foam. High-frequency sounds, such as voices, are absorbed by thinner foam. Identify the primary noise source in your room to choose the best foam.
Consider these points:
- Low-frequency noise: Use thicker, denser foam.
- High-frequency noise: Use thinner, lighter foam.
- Mixed frequencies: A combination of both types is ideal.
Aesthetic Preferences
While functionality is key, aesthetics also matter. Soundproof foam comes in various colors and shapes. Choose foam that complements your room’s decor. Some popular styles include pyramid, wedge, and egg crate designs.
Consider the following:
- Color: Match or contrast with room decor.
- Shape: Select from pyramid, wedge, or egg crate.
- Pattern: Customize layout for a unique look.
Combining both form and function ensures your space is both effective and visually pleasing.
Installation Process
Installing soundproof foam is a straightforward task. It involves a few key steps. Proper installation ensures the foam works effectively. Follow these steps for the best results.
Preparation Steps
Before starting, gather all necessary tools. You will need a tape measure, a utility knife, and a level. Clean the surface where you will install the foam. Make sure it is free from dust and debris. This helps the adhesive stick better.
Measure the area where you plan to install the foam. Cut the foam to fit the measured space. Ensure the foam pieces are cut accurately. This ensures there are no gaps.
Adhesive Options
You have several adhesive options. Each has its own benefits. Choose the one that suits your needs best.
- Spray Adhesive: Easy to use. Provides strong hold.
- Double-Sided Tape: Less messy. Easy to remove.
- Liquid Glue: Permanent. Very strong bond.
Placement Techniques
Proper placement is crucial. It affects the foam’s performance. Follow these techniques for the best results.
- Start at the Center: Begin placing foam from the center of the wall. Work your way outwards. This ensures even coverage.
- Press Firmly: Apply firm pressure to each piece. This helps the adhesive bond well.
- Check Level: Use a level to ensure the foam is straight. Adjust as needed.
- Fill Gaps: Ensure there are no gaps between pieces. This maximizes soundproofing.
Once installed, give the adhesive time to set. Follow the manufacturer’s instructions for best results.
Credit: www.soundproofingstore.co.uk
Best Brands In The Market
Choosing the right soundproof foam can make a big difference in your space. Whether for a recording studio, home theater, or office, the right brand matters. Here, we discuss some of the best brands in the market.
Popular Choices
Some brands stand out due to their consistent quality and customer satisfaction. Auralex Acoustics is a well-known name. They offer products that effectively reduce noise and improve sound quality. Their foam panels come in various shapes and sizes to suit different needs.
Another popular choice is Soundproof Cow. This brand is famous for its versatile and durable foam panels. They offer a range of products that cater to both professional and home users. Their foam is easy to install and provides excellent sound absorption.
High-end Options
For those seeking premium quality, there’s Primacoustic. This brand offers top-tier soundproofing solutions. Their products are designed for high-performance environments. Primacoustic foam panels are known for their superior sound absorption and aesthetic appeal.
Another high-end option is ATS Acoustics. Their foam panels are used in professional studios and theaters. They are highly effective at controlling sound reflections and echoes. ATS Acoustics offers customizable options to meet specific needs.
Budget-friendly Alternatives
Not everyone needs to spend a lot on soundproofing. There are several budget-friendly options that still perform well. One such brand is Foamily. They offer affordable foam panels that are easy to install. Foamily products are great for small studios or home offices.
Another cost-effective choice is Mybecca. This brand offers inexpensive foam panels that provide decent soundproofing. Mybecca products are ideal for those on a tight budget. They are perfect for beginners or temporary setups.
Diy Soundproof Foam Projects
Embarking on a DIY soundproof foam project can be a fun and rewarding experience. With the right materials and guidance, you can transform your space into a quiet haven. This guide will help you through the process step-by-step.
Materials Needed
Before starting, gather all necessary materials. You’ll need soundproof foam panels, adhesive spray or double-sided tape, a utility knife, a measuring tape, and a level. Make sure to have enough foam panels to cover your desired area.
Step-by-step Guide
First, measure the space you want to cover. Use a measuring tape to ensure accuracy. Next, cut the foam panels to fit the measured area using a utility knife. Be precise to avoid gaps.
Apply adhesive spray or double-sided tape to the back of each foam panel. Press the panel firmly onto the wall, starting from one corner and working your way across. Use a level to ensure the panels are straight.
Continue placing the foam panels until the entire area is covered. Make sure each panel is securely attached. This will ensure the best soundproofing effect.
Common Mistakes To Avoid
Avoid using too little adhesive, as this can cause the foam to fall off. Also, don’t leave gaps between panels. These gaps can reduce the effectiveness of your soundproofing. Ensure each panel is level to maintain a neat appearance.
Do not rush the process. Take your time to measure and cut accurately. Rushing can lead to mistakes that are hard to fix. Finally, use enough foam to cover the entire area for optimal results.
Maintaining Soundproof Foam
Maintaining soundproof foam is crucial for ensuring its effectiveness over time. Proper care can extend the life of your foam panels, providing you with a quieter environment. This section will guide you through essential tips for cleaning, understanding longevity, and knowing when to replace worn-out foam.
Cleaning Tips
Regular cleaning of soundproof foam keeps it effective and looking new. Follow these simple steps:
- Dust regularly using a soft brush or vacuum with a brush attachment.
- Spot clean stains with a damp cloth and mild soap.
- Avoid soaking the foam in water; moisture can damage the material.
- Let it air dry completely after cleaning to prevent mold growth.
Longevity And Durability
Soundproof foam is designed to last, but its lifespan can vary. Factors affecting longevity include:
| Factor | Impact on Longevity |
|---|---|
| Quality of foam | Higher quality foam lasts longer. |
| Exposure to sunlight | UV rays can degrade foam over time. |
| Humidity levels | High humidity can cause foam to deteriorate. |
Regular maintenance and proper installation can enhance durability.
Replacing Worn-out Foam
Even with the best care, foam will eventually wear out. Signs that it’s time to replace your soundproof foam include:
- Visible tears or punctures in the foam.
- Foam feels less dense or loses shape.
- Noticeable reduction in soundproofing effectiveness.
- Presence of mold or mildew that cannot be cleaned.
Replacing old foam ensures optimal soundproofing performance.
Additional Noise Reduction Tips
Soundproof foam can greatly reduce noise, but for the best results, combine it with other techniques. Here are some additional noise reduction tips to help you create a quieter space.
Combining With Other Materials
Combine soundproof foam with other materials to enhance its effectiveness. Here are some options:
- Mass Loaded Vinyl (MLV): Install MLV behind the foam to block more sound.
- Acoustic Panels: Place them over the foam for extra sound absorption.
- Carpets: Use thick carpets on floors to reduce noise.
Using Rugs And Curtains
Rugs and curtains can help absorb sound and reduce noise. Consider these tips:
- Thick Rugs: Place thick rugs on the floor to absorb sound.
- Heavy Curtains: Hang heavy curtains over windows to block outside noise.
- Layering: Use multiple layers of rugs and curtains for better results.
Sealing Gaps And Cracks
Gaps and cracks in walls, doors, and windows can let sound in. Seal them for better soundproofing.
- Weatherstripping: Use weatherstripping tape around doors and windows.
- Acoustic Caulk: Seal gaps with acoustic caulk to block noise.
- Door Sweeps: Attach door sweeps to the bottom of doors.
By combining soundproof foam with these additional tips, you can achieve a quieter and more peaceful environment.

Credit: resonics.co.uk
Frequently Asked Questions
What Is Soundproof Foam Used For?
Soundproof foam is used to reduce noise and echo in a room. It enhances sound quality by absorbing sound waves.
How Does Soundproof Foam Work?
Soundproof foam absorbs sound waves, preventing them from bouncing around the room. This reduces noise and echo significantly.
Is Soundproof Foam Effective?
Yes, soundproof foam is effective in reducing noise and improving sound quality. It is widely used in studios and homes.
Can I Install Soundproof Foam Myself?
Yes, you can easily install soundproof foam yourself. It usually comes with adhesive backing for simple application.
Conclusion
Choosing the best soundproof foam improves your room’s acoustics significantly. It reduces unwanted noise, creating a peaceful environment. Consider foam thickness and density for better results. Quality foam ensures long-lasting performance. With the right foam, you enjoy clearer sound and less disturbance.
Invest in good soundproof foam for a quieter, more enjoyable space. Your ears and peace of mind will thank you.