Sticking soundproof foam to a wall can seem tricky. It’s easier than you think.
Soundproofing your space helps reduce noise and creates a peaceful environment. Whether it’s for a home studio, office, or bedroom, proper installation of soundproof foam is key. To begin, you need to understand the basics of soundproof foam and its benefits.
This foam absorbs sound waves, reducing echo and noise. But, simply placing it against the wall won’t work. You need to attach it securely to ensure it performs well. In this guide, we’ll cover the steps and tools needed to stick soundproof foam to your wall effectively. By the end, you’ll have a quiet, serene space ready for any purpose. Let’s dive in!
Tools And Materials Needed
Sticking soundproof foam to a wall isn’t complicated. But having the right tools and materials can make the job much easier. This section will guide you through all the essential tools and required materials you need.
Essential Tools
- Measuring Tape: To measure the wall and foam accurately.
- Level: Ensures that the foam panels are straight.
- Utility Knife: For cutting the foam to fit corners and edges.
- Pencil: For marking measurements on the wall.
- Adhesive Spray: Helps to stick the foam to the wall securely.
- Roller: Presses the foam firmly against the wall.
Required Materials
| Material | Description |
|---|---|
| Soundproof Foam Panels | These are the main components. Choose high-quality foam for better results. |
| Adhesive Spray | Strong adhesive spray to keep the foam attached to the wall. |
| Double-Sided Tape | Optional, for additional support. |
| Cleaning Cloth | To clean the wall before sticking the foam. |
Preparing The Wall
Before sticking soundproof foam to your wall, proper preparation is key. A clean and well-marked wall ensures the foam adheres securely and provides maximum soundproofing. Follow these steps for the best results.
Cleaning The Surface
Start by cleaning the wall. Use a damp cloth to remove dust and dirt. Make sure the wall is dry before moving to the next step. Any debris can affect the foam’s adhesion.
For stubborn stains, use mild soap and water. Avoid harsh chemicals that could damage the wall. Rinse the area well and let it dry completely.
Marking The Placement
Next, mark where you want to place the soundproof foam. Use a pencil and a ruler for straight lines. This helps in aligning the foam panels correctly.
Measure the area to ensure even spacing between panels. Mark the top, bottom, and sides of each panel. This step saves time and prevents mistakes during installation.
Choosing The Right Adhesive
Choosing the right adhesive is crucial for sticking soundproof foam to your wall. The wrong adhesive can lead to poor adhesion, damage to walls, or even falling foam panels. Understanding the different types of adhesives and their pros and cons will help you make the best choice.
Types Of Adhesives
There are various adhesive types available for soundproof foam. Each type has unique properties suited to different surfaces and environments. Here are some common types:
- Spray Adhesive
- Liquid Nails
- Double-sided Tape
- Adhesive Strips
- Construction Adhesive
Pros And Cons
| Adhesive Type | Pros | Cons |
|---|---|---|
| Spray Adhesive |
|
|
| Liquid Nails |
|
|
| Double-sided Tape |
|
|
| Adhesive Strips |
|
|
| Construction Adhesive |
|
|
Cutting The Foam Panels
Cutting the foam panels is a crucial step in soundproofing. It ensures that the panels fit well on your walls. Correct measurements and precise cuts will make the installation process smooth. Here are some tips for measuring and cutting foam panels effectively.
Measuring The Panels
Start by measuring the wall where you will place the foam panels. Use a measuring tape for accuracy. Note down the height and width of each section. This will help you cut the panels to the right size.
Before cutting, double-check your measurements. Accurate measurements save time and avoid waste. If the panels are too big or too small, they will not fit properly.
Cutting Techniques
Use a sharp utility knife or a hot wire cutter. These tools give you clean cuts. Place the foam panel on a flat surface. Align your ruler with the measurement marks. Hold the ruler firmly to guide your cutting tool.
Cut slowly and steadily along the marked lines. Avoid rushing to prevent jagged edges. For thicker foam, you may need to make several passes with the knife. If using a hot wire cutter, keep it steady and follow the guidelines.
After cutting, check the edges. Smooth any rough areas with sandpaper. This will ensure the panels fit together seamlessly. Properly cut panels enhance the overall appearance and effectiveness of your soundproofing.
Applying The Adhesive
Applying the adhesive is a crucial step in sticking soundproof foam to the wall. Proper adhesive application ensures that the foam panels stay in place and provide effective sound insulation. Follow these steps for a smooth and successful application process.
Adhesive Application Tips
First, choose the right adhesive. Use a strong, spray adhesive or double-sided tape designed for foam panels. Test the adhesive on a small area to check for compatibility.
Before applying, clean the wall surface. Remove dust and dirt for better adhesion. Use a damp cloth and let the wall dry completely.
Apply the adhesive to the back of the foam panel. Hold the can 6 to 8 inches away and spray evenly. Cover all edges and the center for strong adhesion.
Ensuring Even Coverage
Even coverage is key to a secure hold. Spray adhesive consistently across the panel. Avoid heavy spots or gaps.
Press the foam panel firmly against the wall. Start from the top and work your way down. Apply even pressure across the entire panel.
Hold the panel in place for a few seconds. This helps the adhesive bond well with the wall.
Repeat these steps for each panel. Ensure all panels align correctly for a seamless look.

Credit: www.youtube.com
Sticking The Foam To The Wall
Soundproof foam can greatly enhance your room’s acoustics. It reduces noise and echoes. Knowing how to attach it is crucial. Follow these steps for a secure fit.
Placing The Panels
First, clean the wall surface. Remove dust and dirt. A clean surface ensures better adhesion. Use a damp cloth for this task.
Next, decide where to place each panel. Measure the wall to ensure even spacing. Use a pencil to mark the spots. This helps in aligning the panels correctly.
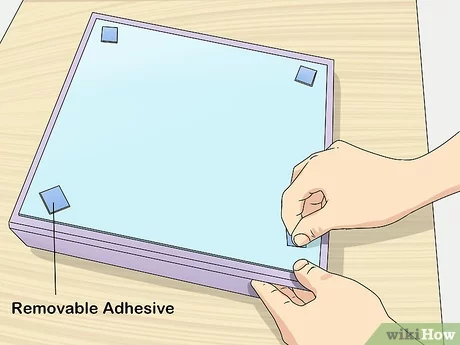
Peel off the adhesive backing of the foam panel. Carefully stick the panel to the marked spot. Press firmly to ensure it sticks well. Repeat for all panels.
Securing The Edges
Pay attention to the edges. They can peel off if not secured properly. Use extra adhesive tape if needed. This keeps the edges in place.
For a more permanent solution, consider using finishing nails. Place them at the corners of each panel. This provides extra security.
You can also use a caulking gun with acoustic sealant. Apply it along the edges of each panel. This prevents any gaps that may let sound through.
| Tools | Purpose |
|---|---|
| Measuring Tape | Ensure even spacing |
| Pencil | Mark placement spots |
| Adhesive Tape | Secure edges |
| Finishing Nails | Provide extra security |
| Caulking Gun | Apply acoustic sealant |
By following these steps, you can effectively stick soundproof foam to your walls. This will significantly improve the sound quality in your room.
Finishing Touches
After successfully attaching the soundproof foam to your walls, the final steps are crucial. These finishing touches ensure the foam stays in place and performs well. Proper finishing also gives your room a neat appearance.
Sealing The Seams
Sealing the seams between foam panels is important. It prevents sound leaks and improves overall effectiveness. Use acoustic sealant or caulk. Apply it along the seams where the foam panels meet.
For a clean look, smooth out the sealant with a wet finger or a caulking tool. This helps it blend with the foam and the wall. Let the sealant dry completely. This ensures it holds the panels firmly in place.
Inspecting The Work
Once you have sealed the seams, inspect your work. Check for any gaps or loose panels. Press on each panel gently to make sure they are secure. If you find any gaps, add more sealant.
Also, ensure the foam panels align properly. Misaligned panels can reduce effectiveness. Adjust them if needed. A final inspection ensures your soundproofing project is successful.
Completing these finishing touches gives you a soundproof space that looks and performs well. Enjoy the quiet and comfort of your newly soundproofed room.

Credit: www.youtube.com
Maintenance Tips
Sticking soundproof foam to your wall is a great way to reduce noise. But to keep them effective, you need to maintain them. Here are some essential maintenance tips to ensure your soundproof foam stays in top condition.
Cleaning The Foam
Regular cleaning helps maintain the foam’s effectiveness. Here’s how you can clean your soundproof foam:
- Use a vacuum cleaner with a brush attachment to remove dust.
- For deeper cleaning, use a mild detergent mixed with water.
- Gently wipe the foam with a soft cloth dampened in the solution.
- Allow the foam to air dry completely before reattaching it.
Make sure to clean the foam at least once a month. This helps in keeping it free from dust and dirt.
Replacing Damaged Panels
If you notice any damaged panels, it’s best to replace them. Follow these steps to replace damaged soundproof foam:
- Carefully remove the damaged panel from the wall.
- Clean the wall surface to remove any adhesive residue.
- Measure and cut a new piece of foam to fit the space.
- Apply adhesive to the back of the new foam panel.
- Press the new panel firmly onto the wall.
Replacing damaged panels promptly ensures that your soundproofing remains effective.
By following these maintenance tips, you can keep your soundproof foam in excellent condition. Regular cleaning and timely replacement of damaged panels will help maintain the soundproofing efficiency of your space.

Credit: www.soundassured.com
Frequently Asked Questions
How Do You Stick Soundproof Foam To A Wall?
To stick soundproof foam to a wall, use adhesive spray or double-sided tape. Ensure the wall is clean and dry. Press the foam firmly for a few seconds.
Can You Use Glue For Soundproof Foam?
Yes, you can use glue for soundproof foam. Use a strong adhesive spray glue. Apply evenly on the foam and wall.
What Is The Best Adhesive For Soundproof Foam?
The best adhesive for soundproof foam is spray adhesive. It provides strong, even coverage. Double-sided tape is also effective.
How To Prepare A Wall For Soundproof Foam?
Clean the wall thoroughly to remove dirt and dust. Ensure the surface is dry and smooth. This ensures better adhesion.
Conclusion
Sticking soundproof foam to your wall is easy with the right steps. Clean the wall first. Measure and cut the foam panels. Apply adhesive spray evenly. Press the foam firmly onto the wall. Hold it for a few seconds. Repeat until the wall is covered.
This simple process improves room acoustics and reduces noise. Try these tips to enjoy a quieter space.