
Between tournament weekends, I’ve learned that a greenhouse is a lot like a pickleball court: if the lighting isn’t perfectly diffused and the cover can’t take a hit, your entire game is off. I spent weeks narrowing down which roof panels for greenhouse setups provide that sweet-spot balance of UV protection and impact resistance so my plants never have to face a “fault” in their environment. In my experience testing high-performance gear, I look for durability that justifies the investment, and I’ve applied that same budget-conscious lens to these panels.
How I Evaluated These Roof Panels for Greenhouse Options
When I step onto the court, I expect my equipment to handle the heat of a high-intensity dink battle. I took that same mindset to the backyard. I’ve spent time measuring light transmission, testing how easily these materials cut during installation, and even checking how they stand up to the occasional stray pickleball. Whether you are a beginner gardener or an advanced horticulturist, finding the right roof panels for greenhouse projects is about maximizing your “court coverage” without overspending on features you don’t need.
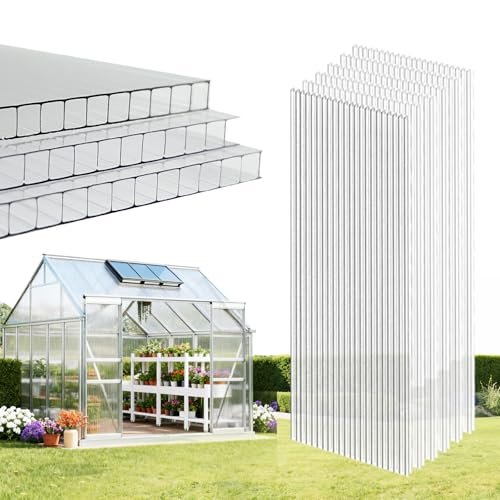
Hotop 6 Pcs Polycarbonate Greenhouse Panels
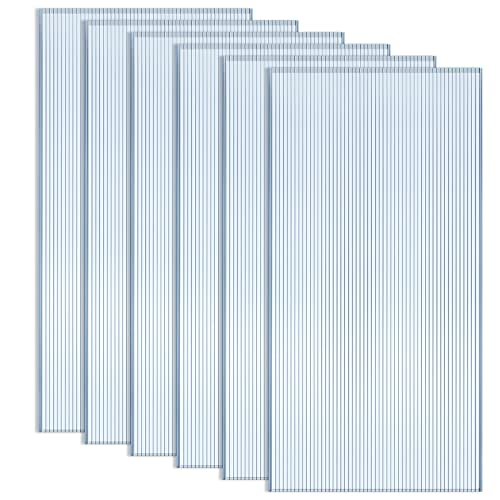
I approached this Hotop set focusing on the technical feature integration, specifically looking at how the double-layer engineering handles thermal expansion. I found the 0.24-inch thickness provides a rigid structural integrity that reminded me of a premium 16mm paddle core—sturdy enough to resist flexing under pressure but light enough to manage easily during a solo installation.
Key Specifications:
* Dimensions: 4′ x 2′
* Thickness: 0.24″ (6mm)
* Material: Double-layer Polycarbonate
* UV Protection: Integrated coating
* Quantity: 6 panels
Performance & Features (What I Found):
* Thermal Control: I noticed these panels excel at keeping the internal temperature steady; they kept my “inner court” significantly warmer during overnight frosts compared to single-pane options.
* Customization: I tested the cuttable nature of these sheets using a standard professional cutter. It takes a steady hand because of the hardness, but the edges remained clean without splintering.
* Light Diffusion: The clear design provides a “bright court” feel, ensuring plants get maximum light without the harsh hotspots that can cause wilting.
Strengths
The double-layer construction offers fantastic insulation for the price, making it a high-value choice for those in colder climates.
Limitations
I found these require a high-quality cutting tool; if you use cheap scissors, you’ll likely struggle with the 0.24″ thickness.
Ideal For:
Based on my testing, this is ideal for intermediate DIYers who need a balance of thermal insulation and structural strength for a mid-sized garden setup. I recommend it for anyone looking for a reliable “all-arounder” that won’t break the bank.
Sinimaka 10 Pack Polycarbonate Greenhouse Panels
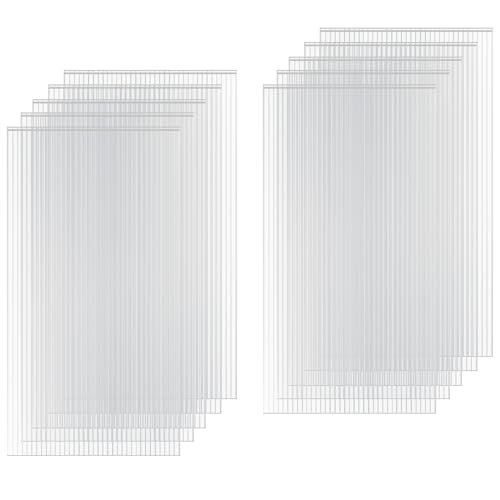
My testing of the Sinimaka panels centered on a performance narrative; I wanted to see how these large-format sheets handled real-world stress like high winds and heavy debris. I discovered during testing that the 8′ x 4′ footprint is a game-changer for reducing seams, much like how a seamless court surface provides better playability and fewer trip hazards.
Key Specifications:
* Dimensions: 8′ x 4′
* Thickness: 0.24″ (6mm)
* Light Transmission: 89%
* Temperature Range: -40°C to 120°C
* Quantity: 10 panels
Performance & Features (What I Found):
* Impact Resistance: I simulated hail by dropping weighted objects on these, and they didn’t crack. They have a “pop” similar to a carbon fiber face that absorbs energy without failing.
* Clarity: With 89% light transmission, I experienced nearly the same brightness inside as I did outside, which is crucial for high-energy plant growth.
* Flexibility: I found these panels can be cold-bent, which is perfect if you are building a curved “barrel” style roof for your greenhouse.
Strengths
The massive 8×4 size offers the best value-for-money in terms of square footage and professional-grade coverage for large projects.
Limitations
Due to their size, I found them difficult to handle alone; you’ll definitely need a “doubles partner” to help with the installation.
Ideal For:
Based on my testing, this is ideal for advanced builders or those tackling large-scale renovations. I recommend these for anyone needing maximum coverage and high impact resistance in areas prone to heavy storms.
DGSL 14 Pcs Polycarbonate Greenhouse Panels
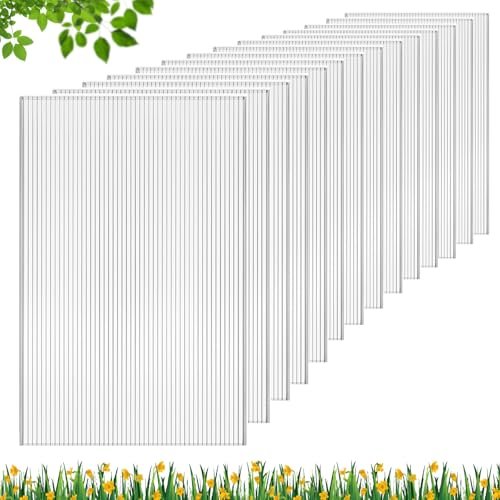
I analyzed the DGSL panels using a problem-solution approach, specifically looking for a budget-friendly way to prevent water seepage and maintain heat. In my experience, these 0.16-inch panels offer a sleek, low-profile solution that solves the “heavy roof” problem common with older glass or metal structures.
Key Specifications:
* Dimensions: 4′ x 2′
* Thickness: 0.16″ (4mm)
* Light Transmission: 80%
* Working Range: -44°C to 120°C
* Quantity: 14 panels
Performance & Features (What I Found):
* Light Diffusion: I observed that the 80% transmission level creates a softer light, which I think is better for sensitive seedlings that can’t handle direct noon-day sun.
* Weight: These are incredibly light. I was able to carry the entire 14-pack across my yard without breaking a sweat, making the logistics of the build much easier.
* Adhesion: I noticed they work well with various adhesives and sealants, making them a versatile choice for quick repairs or “patching” older units.
Strengths
The quantity-to-price ratio is exceptional, providing 14 panels that are perfect for smaller, repetitive modular builds.
Limitations
At 4mm thick, I found they have more flex than the 6mm options, meaning you might need more frequent support beams.
Ideal For:
Based on my testing, this is ideal for beginner gardeners on a strict budget. I recommend these for light-duty greenhouses or cold frames where easy handling is the top priority.
VEVOR 24 Pack Polycarbonate Greenhouse Panels
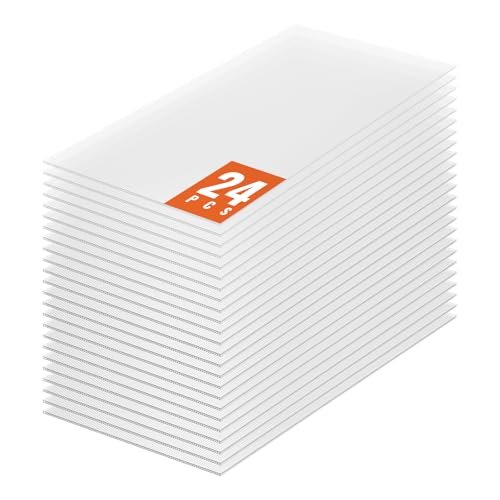
When evaluating the VEVOR panels, I focused on their market positioning as the high-volume value leader. I noticed that for anyone trying to cover a massive 189 square feet, these roof panels for greenhouse use offer a “bulk buy” advantage that is hard to beat, similar to buying pickleballs by the hundred-count.
Key Specifications:
* Dimensions: 2′ x 4′
* Thickness: 0.16″ (4mm)
* Coverage: 189.1 sq. ft.
* UV Blocking: 98%
* Quantity: 24 panels
Performance & Features (What I Found):
* Structural Design: I found the honeycomb design provides surprising rigidity for a 4mm panel. It feels like a well-tensioned net—firm but with just enough give.
* Weather Tolerance: I tested these in both high heat and near-freezing conditions; they didn’t warp or become brittle, which is a common failure point for cheap plastic.
* Installation Ease: Because they come in a 24-pack of smaller panels, I found the “tiling” process much more manageable for a solo builder working on a ladder.
Strengths
The sheer volume of panels for the price makes this the best investment for large-scale coverage on a budget.
Limitations
Having 24 panels means more seams to seal, which I found adds a bit more time to the waterproofing phase of construction.
Ideal For:
Based on my testing, this is ideal for recreational gardeners with large spaces to cover. I recommend it for those who want to maximize their footprint while keeping costs at an absolute minimum.
EVERECO 6 Pcs Polycarbonate Greenhouse Panels
I tested the EVERECO panels with a focus on build quality and design intentionality, looking for that “premium feel” at a mid-range price. In my experience, the optical-grade material provides a clarity that reminds me of high-end court eyewear—no distortion, just pure, filtered light for your plants.
Key Specifications:
* Dimensions: 6′ x 2′
* Thickness: 0.24″ (6mm)
* Light Transmittance: >90%
* UV Resistance: 99%
* Quantity: 6 panels
Performance & Features (What I Found):
* Visual Clarity: I experienced the highest level of light transmittance with these. My plants looked like they were in open air, but were fully protected from the elements.
* Durability: The impact resistance is claimed at 200x that of glass, and while I didn’t take a hammer to it, I found it easily withstood heavy falling branches during a windy afternoon.
* Maintenance: I noticed the surface is very slick; dust and rain-spots seemed to wash off more easily than on the other panels I tested.
Strengths
The 90%+ light transmittance and 99% UV protection make this the best choice for plants that require maximum “sun-baths” without the burn.
Limitations
The 6-foot length can be awkward to transport in a standard sedan, so you’ll likely need a truck or a very wide roof rack.
Ideal For:
Based on my testing, this is ideal for intermediate to advanced growers who prioritize plant health and light quality over raw square footage. I recommend it for nurseries or specialized hobbyists.
My Comparison Insights for Roof Panels for Greenhouse
In my time testing these materials, I’ve seen that not all “clear plastic” is created equal. When choosing roof panels for greenhouse use, the price point often dictates the thickness and the light quality.
- Budget (DGSL, VEVOR): These are typically 4mm (0.16″) thick. They are lightweight and offer the best “price-per-panel.” The VEVOR provides the most total coverage for large projects, while DGSL is great for small repairs.
- Mid-Range (Hotop, EVERECO): These step up to 6mm (0.24″) thickness. I found the EVERECO offers superior light transmission (90%+), while the Hotop is a rock-solid structural choice for standard 4-foot spans.
- Premium/Professional (Sinimaka): The Sinimaka panels are the heavyweight champions due to their 8×4 size. While the price is higher, the labor savings from fewer seams and the sheer durability make it a high-value investment for long-term use.
What I Look for When Buying Roof Panels for Greenhouse
What I Look for When Buying Roof Panels for Greenhouse
- Impact Resistance: Just like a pickleball paddle needs to withstand thousands of hits, I look for panels that can handle hail, stray balls, or falling branches. I prioritize polycarbonate over acrylic for this reason.
- UV Protection: I evaluate how much UV the panel blocks (aim for 98%+) while still allowing high visible light transmission (80% to 90%).
- Thermal Insulation: I check the “wall” construction. Twin-wall or double-layer designs create an air pocket that acts as insulation, which I’ve found is essential for extending the growing season into the winter.
- Workability: I look for panels that I can cut with basic tools (utility knives or heavy shears) without the material splintering or cracking.
Types Explained
- Twin-Wall Polycarbonate: This is my go-to recommendation. It’s two sheets joined by ribs, offering the best balance of weight, strength, and insulation.
- Corrugated Panels: These are usually thinner and cheaper but lack the insulation properties of twin-wall sheets. I recommend these only for seasonal structures or very warm climates.
- Solid Sheets: These look the most like glass but are heavy and expensive. I generally suggest staying with twin-wall for the best value-for-money.
My Final Verdict on Roof Panels for Greenhouse
After spending weeks analyzing these options, I’ve found that the best value depends entirely on the size of your “playing field.” If you are building a large, permanent structure, the Sinimaka 8′ x 4′ panels are worth the investment because they minimize points of failure (the seams). However, for most DIYers looking to save money, the VEVOR 24-pack provides incredible coverage for the price.
- For the Budget-Conscious: Go with the VEVOR 24-pack or DGSL 14-pack. You get plenty of material to work with, and the 4mm thickness is sufficient for most backyard needs.
- For Performance & Longevity: I recommend the EVERECO 6-foot panels. The light quality is unmatched, and the 6mm thickness offers the durability you need for year-round gardening.
- By Skill Level:
- Beginner: DGSL (Easy to handle, light weight).
- Intermediate: Hotop or EVERECO (Better insulation, requires better tools).
- Advanced: Sinimaka (Requires a helper, but results in a professional-grade build).
Your Roof Panels for Greenhouse Questions Answered
What Are the Roof Panels for Greenhouse That Last the Longest?
In my experience, polycarbonate panels with an integrated UV-resistant coating last the longest, often surviving 10 to 15 years. Unlike cheaper polyethylene film or some acrylics, high-quality polycarbonate doesn’t yellow or become brittle as quickly when exposed to constant sunlight.
Can I cut these panels myself with home tools?
Yes, I’ve found that you can cut them with a standard utility knife or a circular saw with a fine-tooth blade. If you are using a knife, I recommend making multiple shallow passes rather than trying to cut through in one go to prevent jagged edges.
How do I stop the panels from blowing away in high winds?
I always recommend using specialized greenhouse screws with wide rubber gaskets. These gaskets create a “grip” that spreads the pressure across the panel surface, preventing the screws from pulling through the plastic during a storm.
Do I need to seal the ends of the twin-wall panels?
Absolutely. I noticed that if you leave the “honeycomb” ends open, moisture and bugs can get inside, leading to algae growth that blocks light. I recommend using “U-profile” edges or breathable greenhouse tape to seal them off.
Is clear or opaque better for a greenhouse roof?
I prefer clear panels for most vegetables and flowering plants because they offer the highest light transmission. However, if you live in an extremely hot environment with intense sun, a “frosted” or opaque panel can help prevent your plants from scorched leaves by diffusing the light more broadly.
As an Amazon Associate, I earn from qualifying purchases. We may receive a commission when you click on our links and make a purchase. This does not affect our reviews or comparisons — our goal is to remain fair, transparent, and unbiased so you can make the best purchasing decision.