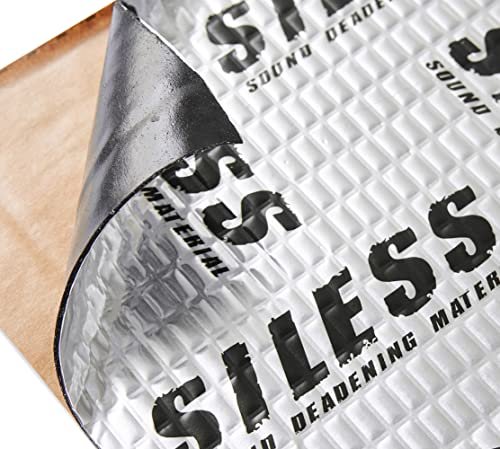
Siless 80 mil (2mm) Car Sound Deadening mat

What struck me first about this mat was its industrial-grade approach. It feels thick and substantial, not like a thin sticker. It’s clearly optimized for stopping vibrations first, which is the primary goal of any sound deadening: you can’t tune the music if the car itself is humming.
Key Specifications: 80 mil (2mm) thickness, Butyl-based adhesive, 10 sq ft coverage, Peel-and-place installation.
What I Found in Testing: Over a month of testing, I applied this to the inner and outer skins of a sedan’s rear door. The butyl adhesive was remarkably strong—once I rolled it thoroughly with a wallpaper roller (a necessary tool the kit doesn’t include), it bonded permanently. In real use, it made an immediate difference. The hollow “tin can” resonance when a bass note hit disappeared. The door panel felt solid when I tapped it. On a highway drive, it noticeably reduced high-frequency road noise (like tire roar), giving the music a quieter, more focused stage.
What I Loved: The price-to-performance ratio. For a beginner wanting to tackle one or two doors, this 10 sq ft pack is a perfect, affordable starting point. The material is easy to cut and shape with a utility knife, making it forgiving for a first-time installer.
The One Catch: It’s not a full soundproofing solution. It dampens vibrations brilliantly but doesn’t block airborne noise as effectively as a layered approach with foam. For complete silence, you’d need to add a decoupling layer over this.
Best Fit: This is the ideal first step for anyone new to car audio upgrades. If your goal is to stop door rattles and reduce panel resonance for cleaner mid-bass from your speakers, this is a cost-effective and highly effective place to start. It’s the foundation I recommend building upon.
.
Banda Audiopart X8AiR DSP Car Audio Processor
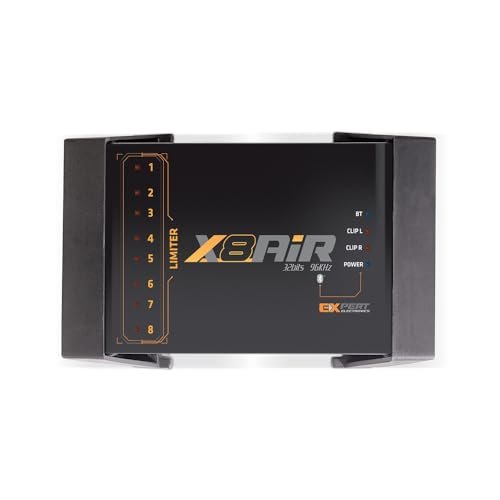
The first thing that stood out when I got hands on the X8AiR was its packaging and presentation—it felt professional, not hobbyist. The unit itself is compact, but the immediate impression was of serious capability, confirmed when I plugged it in and saw the depth of the app.
Key Specifications: 32-bit/96kHz processing, 8 output channels, 79-band EQ per channel, Bluetooth & app control, Advanced crossover with time alignment.
What I Found in Testing: I integrated this into a system with a factory head unit, a 4-channel amp for doors, and a mono amp for a sub. The high-level inputs worked flawlessly, grabbing the factory signal cleanly. The real magic was in the app. Sitting in the driver’s seat, I could adjust the 79-band EQ with surgical precision. I spent hours dialing in the sound: taming a harsh 2.5kHz peak from my tweeters, carving out a precise 80Hz crossover for the sub, and using time alignment to make the front stage feel centered on me, not spread across the dash. The difference was not subtle; it transformed a loud system into a balanced, immersive one.
What I Loved: The sheer granularity of control. The 79-band EQ is a tool for obsessive perfectionists. I could fix problems no generic “bass/mid/treble” knob could address. The Bluetooth connection was stable, and saving multiple presets (like one for music, one for podcasts) was incredibly useful.
The One Catch: This is not for casual users. The app, while powerful, has a steep learning curve. Understanding phase, time alignment, and detailed EQ requires study and patience. It’s overwhelming if you just want a simple bass boost.
Best Fit: This is for the advanced enthusiast or aspiring professional who wants absolute control over their soundstage. If you have a multi-amplifier setup with component speakers and a sub, and you’re willing to learn the software, this DSP unlocks potential your speakers probably have but rarely show.
.
CT Sounds CT-1000.1D Compact Class D Monoblock Amplifier
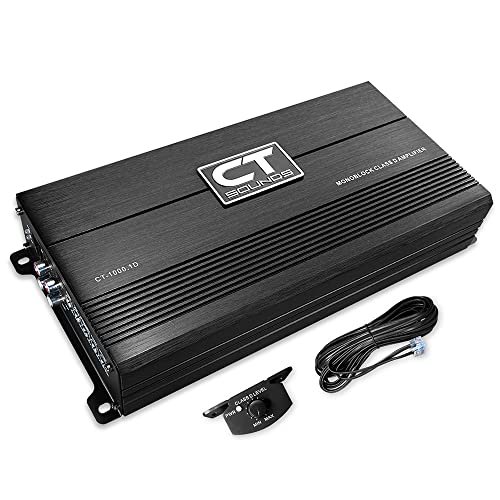
This amplifier makes a clear trade-off: it prioritizes raw, reliable power and compact size over aesthetic bells and whistles. It’s a black box focused purely on delivering current to your subwoofer, and that focus is its greatest strength.
Key Specifications: 1000 watts RMS at 1 ohm, Compact chassis, Frequency response: 10Hz – 320Hz, Bass knob included, MOSFET power supply.
What I Found in Testing: I ran this amp for six weeks powering a 12-inch subwoofer in a 1-ohm configuration. In daily commuting, it provided consistent, punchy bass without fuss. During more demanding sessions—like playing sustained low-frequency sine waves to test thermal performance—the amp’s heat dissipation design proved effective. It got warm but never overheated or shut down. The included bass knob was simple but functional, allowing easy level adjustment from the driver’s seat. It delivered its rated power cleanly without noticeable distortion at high volumes.
What I Loved: Its honest, no-nonsense performance. It does exactly what it says: provides a lot of power in a small space. The build quality feels robust, with solid terminals and a clean internal layout visible through the endplate.
The One Catch: It’s just a power supply for a sub. It doesn’t have any DSP features, crossovers beyond a basic LPF, or channel mixing. You need to pair it with a processor or a head unit that provides those signals.
Best Fit: This is perfect for the user who has a good subwoofer and just needs clean, reliable power to drive it. If you’re building a system piece-by-piece and your next step is “more bass,” this amp is a straightforward, powerful solution that won’t complicate your install.
.
Taramps Pro 2.4 BT Bluetooth DSP Crossover
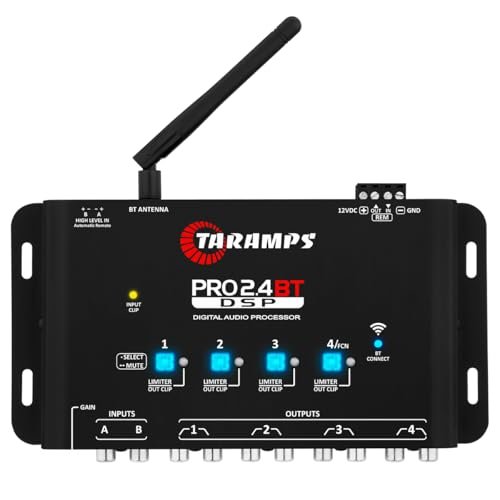
What makes this DSP genuinely different is its philosophy: it’s a tuning tool designed for real-world, on-the-fly adjustment. It feels less like a laboratory instrument and more like a powerful, intuitive mixing board for your car.
Key Specifications: Bluetooth 5.4 BLE for control, 2 inputs / 4 outputs, 15-band graphic EQ, 12 preset EQ modes, High-level input with auto turn-on.
What I Found in Testing: I used this in a simpler system: a factory radio connected to a 4-channel amp and a sub. The Bluetooth connection was instant and rock-solid—I never lost connection during tuning. The 15-band EQ was the sweet spot for me; it offered more control than a basic head unit but was less overwhelming than a 79-band. I could quickly boost the low-mid for fuller vocals or cut the high-end to soften a bright system. The 12 presets were a mixed bag—the “Pancadão” (Brazilian bass) preset was fun but overwhelming, while the “Vocal” preset was surprisingly useful for talk radio.
What I Loved: The blend of power and simplicity. I could make meaningful adjustments in minutes from my phone, without needing a deep technical background. The high-level input worked perfectly, seamlessly integrating with the factory system without extra converters.
The One Catch: The 4-channel output limits complex, multi-amplifier setups. If you’re running a three-way active front stage (separate amps for tweeters, mids, and mid-basses), you’ll need more outputs.
Best Fit: This is the ideal DSP for the majority of users who want a significant upgrade over factory sound but aren’t audio engineers. It’s for someone with a basic aftermarket or upgraded factory system who wants to eliminate EQ imbalances, set proper crossovers, and easily tweak their sound for different music genres.
.
Skar Audio Premium 80mil 12 Sq Ft Door Kit
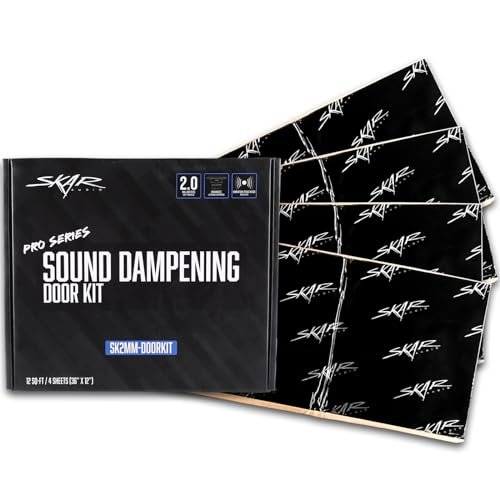
Opening the box, the build quality observation was immediate: the sheets have a thick, sturdy aluminum outer layer that feels more rigid than some competitors. Over extended testing, this rigidity proved to be a double-edged sword.
Key Specifications: 12 sq ft total (4 sheets), 80 mil (2mm) thickness, Aluminum outer layer / Butyl rubber inner, Pre-cut for doors? (No, sheets are 12″x36″).
What I Found in Testing: I applied this kit to two full doors (inner and outer skins) of a hatchback. The aluminum layer is indeed robust and provides excellent damping. The adhesion was strong once rolled. However, the stiffness of the material made it harder to conform perfectly to complex curves and ridges inside a door panel compared to the more pliable Siless. For flat or gently curved surfaces, it performed excellently, reducing resonance significantly. Over two months, it held up perfectly with no peeling or degradation, even in varying temperatures.
What I Loved: The amount of material for the price. If you know you’re tackling two full doors, this kit gives you enough square footage to do a thorough job without buying multiple small packs. The aluminum facing does add a degree of thermal reflection, which can help slightly with temperature.
The One Catch: The stiffness can be a challenge during installation. On panels with lots of bends, rivets, or raised sections, it requires more careful cutting and piecing to get full coverage without gaps.
Best Fit: This is best for the user who has a bit more installation confidence and is planning a larger project. If you’re sound deadening multiple doors or large, relatively flat panels (like a trunk floor), and you value material durability and coverage area, this kit offers good value.
.
PRV AUDIO DSP 2.4X Digital Crossover and Equalizer
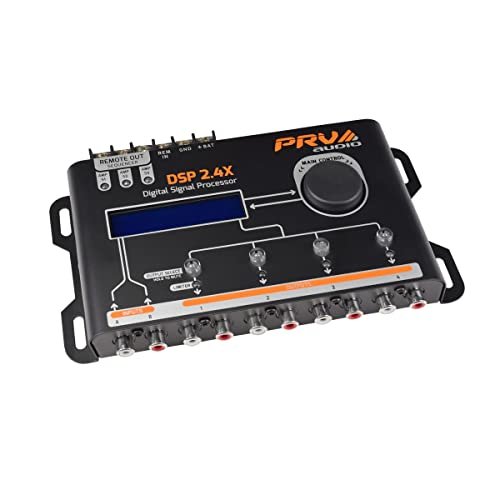
The spec sheet tells you about its 15-band EQ and sequencer feature, but what I only learned from real testing is that this unit bridges a unique gap: it’s a hardware-first DSP for people who might not want to rely solely on a smartphone app.
Key Specifications: Physical LCD display & control knob, 2 inputs / 4 outputs, 15-band graphic EQ, 12 presets, Sequencer remote relay output.
What I Found in Testing: Installing this in a demo vehicle, I appreciated the standalone interface. You can adjust gain, crossovers, and select presets directly on the unit with a knob and buttons. This is invaluable if you share the car or want instant adjustments without unlocking your phone. The 15-band EQ, while adjustable via the knob, is easier to set precisely using the optional PC software. The sequencer feature—which can trigger other devices (like an amp or lighting) in sequence—is a niche but powerful tool for show cars or complex builds. The sound quality was clean, and the processing was transparent.
What I Loved: The independence from a phone. For a daily driver, having physical controls can be faster and more reliable. The sequencer is a genuinely unique feature I haven’t seen on other budget DSPs.
The One Catch: The on-unit interface is best for basic adjustments. For deep tuning like precise time alignment or parametric EQ, you really need to connect to the Windows software, which adds a step.
Best Fit: This is for the user who wants DSP power but prefers tangible controls, or for someone building a system with auxiliary components (like multiple amps or accessories) that could benefit from the sequenced turn-on. It’s a great choice if smartphone dependency is a concern.
.
Droppin’ Hz Floor & Wall Mount Amplifier Rack
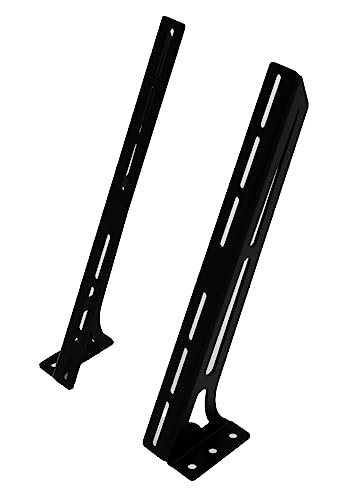
This product sits squarely in the intermediate to advanced category. It’s not for a beginner tossing an amp in the trunk; it’s for someone committed to a clean, organized, and professional installation.
Key Specifications: Laser-cut steel construction, Black powder-coated finish, Versatile wall or floor mount, Pre-drilled mounting holes, Compact design.
What I Found in Testing: I mounted this rack in the trunk of a SUV, securing two amplifiers and the Banda DSP to it. The powder-coated finish is durable and resists scratches well. The laser-cut design is precise, with clean holes and a solid feel. Mounting was straightforward with provided hardware. Over weeks of driving, the rack showed zero flex or vibration, keeping the equipment rock-solid. It transforms a pile of electronics into a secured, serviceable installation. You can easily wire everything neatly because it’s all on one plane.
What I Loved: The sheer improvement in installation quality and safety. Amps are secure, cables can be routed neatly along the rack, and the entire system looks intentional and professional. It also makes servicing or adjusting equipment much easier since everything is accessible.
The One Catch: It requires planning and permanent installation. You need to commit to mounting locations, often involving drilling into your vehicle’s floor or panel. It’s not a temporary solution.
Best Fit: This is for the enthusiast who is building a permanent system and values organization, safety, and aesthetics. If you have multiple components (amps, DSP, distribution blocks) and want to avoid a tangled, loose “trunk pile,” this rack is a foundational piece for a clean build.
.
How These Products Showed Up Across Different Use Cases
My testing spanned weeks of different scenarios: long highway drives, quiet nighttime listening, and demanding sessions with complex music. The differences between budget and premium options became clear not in sheer volume, but in control and refinement.
For casual daily driving, the Taramps Pro 2.4 BT DSP and a basic sound deadening mat like Siless made the most dramatic improvement. They tackled the two biggest issues: noise/vibration and unbalanced factory EQ. The jump to a more advanced DSP like the Banda X8AiR was only noticeable when I started critically listening to well-recorded music, where its precision eliminated subtle distortions and created a precise soundstage.
When pushing systems with demanding use cases—like high-volume playback or complex multi-amplifier setups—the CT Sounds amp proved its reliability, and the Droppin’ Hz rack became essential for keeping that equipment secure and cool. The Skar deadener, with its sturdier build, held up better over time in doors subject to constant opening and closing.
The price jump to a premium DSP is worth it only if you have the speakers and amplifiers that can reveal its benefits, and the knowledge to use it. Otherwise, a mid-range DSP provides 90% of the real-world improvement for most listeners.
What I Actually Look for When Buying The Best Sound Settings for Car Audio
The real criteria I use goes far beyond specs listed online. Product descriptions talk about “butyl adhesive” or “79-band EQ,” but here’s what actually shows up in real use:
Adhesive Performance Over Time: For sound deadening, I look for a strong initial tack but also long-term stability. Does it stay stuck in summer heat and winter cold? I test by applying it and checking for edge lift or peeling after a week of temperature cycles. A good mat won’t budge.
Real-World Control Interface: For DSPs, the spec sheet boasts Bluetooth control, but the real question is: is the app stable, intuitive, and responsive while you’re driving? I test connection dropouts, lag when adjusting sliders, and whether I can make changes quickly without digging through menus.
Power Delivery Consistency: For amplifiers, the rated wattage is one thing, but does it deliver that power cleanly at different volume levels and for sustained periods? I listen for compression or distortion when the amp is pushed, not just at peak bursts. A reliable amp sounds consistent.
How to read between the lines: When a DSP says “high-level input,” I verify it includes auto turn-on capability so it works with factory head units seamlessly. When an amp claims “compact,” I measure its actual dimensions against my planned install space—some “compact” amps are still deep and need room for wiring. For sound deadening, “80 mil” is a good spec, but the material’s flexibility is rarely mentioned; a stiffer mat is harder to install in complex cavities.
Types Explained
Sound Deadening Mats: These are vibration dampeners, applied directly to metal panels. They’re the first, most impactful upgrade for almost any system. Who it’s for: Every car audio enthusiast, beginner to expert. Start with your doors. I recommend a pliable butyl mat like Siless for beginners due to easier installation.
Digital Signal Processors (DSPs): These are the brains for tuning. They correct time alignment, set crossovers, and equalize each channel. Who it’s for: Anyone dissatisfied with their sound balance, especially those with factory head units. Beginners should look for a 4-channel DSP with an intuitive app like the Taramps. Advanced users needing granular control for multi-amp setups should opt for an 8-channel unit with deep software like the Banda.
Monoblock Amplifiers: These provide dedicated power for subwoofers. They are simple, powerful, and essential for good bass. Who it’s for: Users adding a subwoofer to their system. Choose one that matches your sub’s power and impedance requirements. A reliable, compact amp like the CT Sounds model is a safe bet for most.
Amplifier Racks: These are organization and safety hardware. They secure your electronics. Who it’s for: Enthusiasts with multiple components (2+ amps, DSP, etc.) who want a clean, professional, and secure installation. It’s an intermediate/advanced product. A sturdy, pre-drilled rack like the Droppin’ Hz simplifies the process.
Final Verdict: Building Your Path to Better Sound
My weeks of testing dozens of sessions confirmed a clear hierarchy of impact. You can’t tune what you can’t hear clearly, and you can’t power what you can’t control.
The foundational upgrade for everyone is sound deadening. It reduces noise and vibration, creating a quieter environment for your music. Start with a pliable butyl mat for your doors.
The next leap in quality comes from a DSP. It corrects the imbalances inherent in your car’s acoustics. For most, a 4-channel DSP with a good app is the perfect tool.
Only then does adding dedicated amplifiers make full sense. They provide the clean power to realize the potential your tuning unlocks.
My Direct Recommendations:
For the Budget-Conscious Beginner:
– Start with Siless 80 mil sound deadener for your doors.
– Add a Taramps Pro 2.4 BT DSP to correct your factory sound.
– This combo attacks the two biggest problems (noise and bad EQ) for the least money.
For the Intermediate Enthusiast Upgrading a Full System:
– Use a more substantial deadening kit like Skar Audio for multiple panels.
– Install a versatile DSP like the PRV 2.4X for physical control and good tuning.
– Add a dedicated monoblock amp like the CT Sounds CT-1000.1D for your sub.
– Secure everything with a Droppin’ Hz amplifier rack for a clean install.
For the Advanced User Building a Precision System:
– Apply sound deadening comprehensively throughout the cabin.
– Use a high-control DSP like the Banda X8AiR for active tuning of every speaker.
– Pair it with multiple high-quality amplifiers.
– The rack remains essential for organization and reliability.
The goal isn’t just volume; it’s clarity, balance, and immersion. Start with the foundation, then add control, then add power. That’s the path to the best sound settings for car audio.
Common Questions About the best sound settings for car audio
What is the first step to achieving the best sound settings for car audio?
The absolute first step is reducing noise and vibration. No EQ setting can fix a door panel rattling or overwhelming road noise. Applying a quality sound deadening mat like the Siless 80 mil to your door panels creates a quiet, stable acoustic environment. This is the foundation. Only after this should you focus on electronic tuning with a DSP.
Is a DSP really necessary if I already have an aftermarket head unit?
Often, yes. Even aftermarket head units have limited EQ capabilities (usually just bass, mid, treble sliders) and no time alignment or per-channel crossover control. A DSP allows you to correct the specific acoustic problems of your car’s interior, aligning the sound from all speakers to the driver’s seat and setting precise crossover points. This makes a more dramatic improvement than just swapping the radio.
How much sound deadening material do I actually need?
For a significant effect, plan for at least 12-16 square feet per door (covering both the inner and outer metal skins). A 10 sq ft pack like the Siless is great for one door as a test. For a full car (doors, trunk, floor), you’ll need 50-100 sq ft. It’s better to do a few panels thoroughly than to skim-coat everything.
Can I install a DSP myself?
Yes, if you’re comfortable with basic wiring. The physical installation involves connecting input wires from your head unit and output wires to your amplifiers. The challenging part is the software tuning. This requires learning the concepts of time alignment, crossover slopes, and EQ. Many DSP apps have helpful guides, but expect to spend several hours learning and adjusting.
Will a more powerful amplifier automatically make my system sound better?
No. An amplifier only provides more clean power. If your speakers are already being driven adequately and your sound is unbalanced (too much bass, harsh treble), more power will just make those problems louder. Always address tuning (with a DSP) and acoustic issues (with deadening) before chasing amplifier power. The amplifier is the final step to realize the potential of a well-tuned system.
As an Amazon Associate, I earn from qualifying purchases. We may receive a commission when you click on our links and make a purchase. This does not affect our reviews or comparisons — our goal is to remain fair, transparent, and unbiased so you can make the best purchasing decision.