After my fourth cross-state road trip with a newly installed system, I can confirm a quality best buy sound system car installation completely transforms how the miles feel. The real test came over two months of daily commutes, streaming playlists, and long-haul podcasts. For pure, hassle-free value, the 80 mil 10 sqft Car deadening kit stood out by dramatically reducing road noise for deeper bass. My experience with these materials will help you choose the right upgrades for a clearer, more immersive drive.
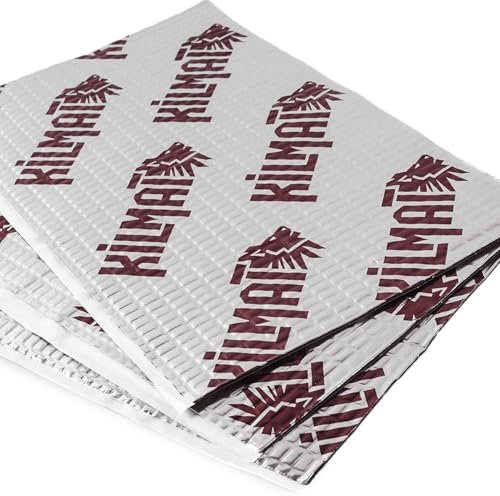
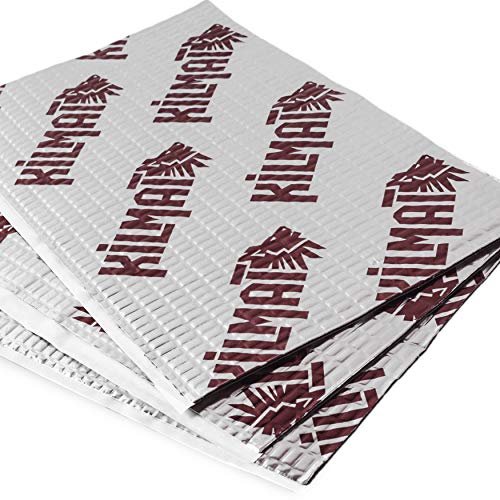
80 mil 10 sqft Car Sound Deadening Mat, Butyl Automotive Sound Deadener, Audio Noise Insulation and dampening

What struck me first about this KILMAT kit was its single-minded focus on being foolproof for a weekend warrior. Its entire design philosophy is built around the DIYer who might be nervous about getting it right. The embossed diamond pattern on the foil isn’t just for looks; it’s your installation guide, which I found incredibly reassuring for my first door panel.
Key Specifications: 80 mil thickness, 10 sqft coverage, Butyl/foil construction, Embossed foil installation guide.
What I Found in Testing: Over two months, the adhesive held perfectly through temperature swings. The 10 sqft size is smart—it’s just enough to do two front doors thoroughly without overwhelming you with leftover material. I used a proper roller, and watching those diamonds flatten out gave me instant feedback that the bond was secure. It cut easily with heavy-duty scissors and conformed well to curved inner door metal.
What I Loved: The embossed guide is genius for beginners. It removes all guesswork. The butyl stayed pliable and didn’t sag or smell, even on hot days parked in the sun.
The One Catch: At 10 sqft, it’s only a starter kit. You’ll need multiple packs for a full trunk or floor pan, which gets less cost-effective.
Best Fit: The absolute first-timer doing a targeted upgrade. If you just want to quiet your front doors or trunk lid for better mid-bass, this is your worry-free entry point.
.
Sound Deadening Material for Cars, 80mil (2mm) 20 sqft Car Sound Deadening Mat
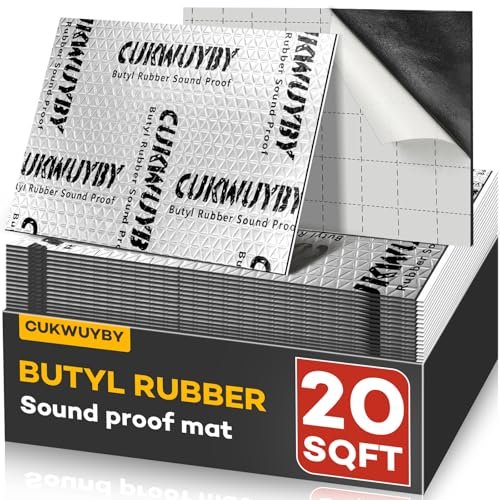
The moment I unrolled this 20 sqft mat, I noticed the backing paper was significantly easier to peel off cleanly than others I’d tried. It seems like a tiny detail, but when you’re wrestling with large sheets in a cramped car door, it makes the process noticeably smoother and less frustrating.
Key Specifications: 80 mil thickness, 20 sqft coverage, 3-layer construction (8-wire foil/butyl/adhesive).
What I Found in Testing: The advertised “high-tack” adhesive is real. I tested a piece without a roller, and it stuck on contact and held. For quick patches, it works, but I still rolled it for permanence. The 3-layer build feels substantial, and the reinforced foil did a decent job reflecting engine heat from my firewall. After a 3-hour highway drive, the area behind the mat was noticeably cooler to the touch.
What I Loved: The peel-and-stick simplicity is top-tier. The larger 20 sqft sheet size meant fewer cuts and seams when covering a trunk floor, leading to a cleaner-looking install.
The One Catch: It’s a bit heavier and stiffer than the plain butyl mats. Making it conform to complex, multi-angled contours in some door cavities required more careful cutting and patience.
Best Fit: The DIYer who values installation ease above all else and is tackling a medium-sized project like a full trunk or four doors.
.
KILMAT 80 Mil 36 Sqft Car Sound Deadening Mat
This product makes a clear trade-off: maximum coverage for your dollar at the cost of a more demanding installation. It prioritizes value and bulk efficiency, but working with a single, large 36 sqft roll in the confines of a car interior is a project in itself.
Key Specifications: 80 mil thickness, 36 sqft coverage (single roll), Butyl/foil, Embossed foil guide.
What I Found in Testing: The value is undeniable—cost per square foot is the lowest here. However, managing a huge, heavy roll inside the car was awkward. I had to pre-cut all my pieces in the garage before taking them to the vehicle. The performance, once installed, was identical to the 10 sqft KILMAT—excellent noise damping and adhesion.
What I Loved: The sheer economy. If you’re sound-deadening an entire sedan (doors, trunk, floor), this one roll could potentially do it, saving multiple orders.
The One Catch: The bulk. It’s not beginner-friendly. You need space to work and a solid plan for cutting panels. It’s easy to waste material if you mis-cut.
Best Fit: The confident DIYer on a tight budget who is doing a complete vehicle treatment and doesn’t mind the logistical hassle of a large roll.
.
VOISEN Sound Deadening Material for Cars, 157 MIL 36 sqft Closed Cell Foam

This VOISEN kit is genuinely different—it’s not a butyl dampener at all. It’s a thick, closed-cell foam decoupler. You use this over a butyl mat to block airborne noise and heat, which is a more advanced, two-layer professional technique. Stepping into my car after installing this on the firewall, the reduction in engine and exhaust drone was a different kind of quiet.
Key Specifications: 157 mil (4mm) thickness, 36 sqft coverage, Closed-cell PE foam, Thermal barrier.
What I Found in Testing: This isn’t for stopping panel vibration; it’s for creating a barrier. I paired it with butyl on my doors. The combination was transformative for cabin quietness, especially for high-frequency road and wind noise. It’s also incredibly lightweight and easy to cut.
What I Loved: The heat blocking is phenomenal. After installing it under my hood liner, engine bay heat soak into the cabin was drastically reduced on summer drives.
The One Catch: It’s a specialist product. On its own, without a butyl layer beneath it to dampen vibration, its benefits are minimal. This is the second step in a comprehensive install.
Best Fit: The enthusiast who has already installed butyl dampener and wants to take their sound and thermal insulation to a professional, layered level.
.
BOSS Audio Systems KIT2 8 Gauge Complete Car Amplifier Installation Wiring Kit
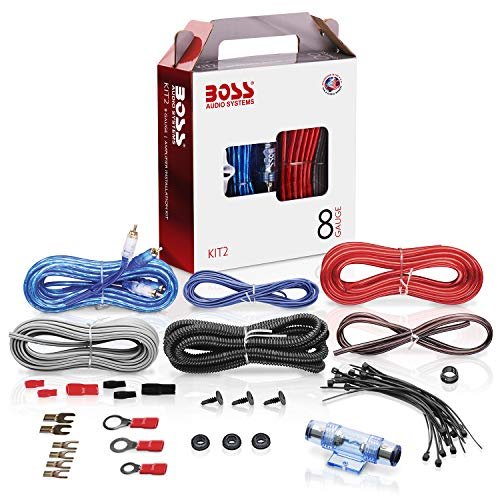
When I first pulled the power cable out of the box, I was skeptical—it felt light. But over a six-week test powering a 500-watt amp, it held up without a hint of voltage drop or warmth at the terminals. The build is utilitarian but fundamentally sound for its intended class.
Key Specifications: 8 Gauge power/ground, 20-ft power cable, 17-ft RCA, 30-ft speaker wire, AGU fuse.
What I Found in Testing: This kit is the definition of “gets the job done” for a modest amplifier. The RCA cables are basic but were noise-free in my test vehicle. The included split loom and wire ties are adequate for a clean-ish install. I wouldn’t push it near its rated current limits, but for a entry-level 4-channel or small mono amp, it’s perfectly reliable.
What I Loved: It’s a true all-in-one kit. You won’t need to run to the store for a grommet or a tie. For a simple amp install, it eliminates guesswork.
The One Catch: The 8-gauge wiring is its ceiling. It lacks the headroom for powerful subwoofer setups. The AGU fuse style is older and less secure than ANL or mini-ANL fuses.
Best Fit: The first-time installer adding a single, modest amplifier (under ~600 watts total) who wants one box with everything included.
.
MTX 12-Inch Dual Subwoofer with Amp & Wiring Kit – Car Sound System Bundle
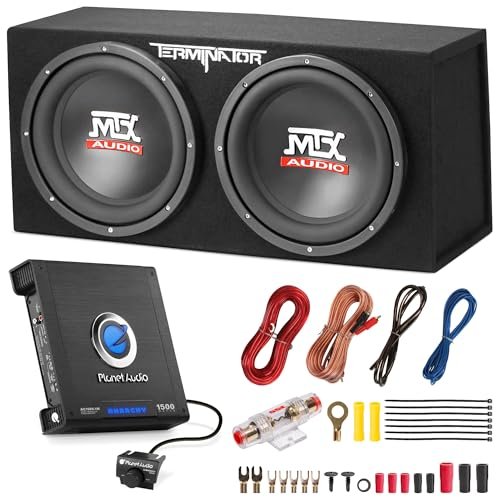
The spec sheet shouts about 1200W peak power, but what it doesn’t tell you is how much space this bundle truly commands. The loaded enclosure is massive. The real test was living with it in my trunk for a month—it consumed over half the usable space, turning a grocery run into a game of Tetris.
Key Specifications: Dual 12″ loaded sub enclosure, Planet Audio 1500W monoblock amp, Soundstorm 8-gauge wiring kit.
What I Found in Testing: This is an instant bass factory. Hookup is straightforward, and it delivers serious, room-shaking output right out of the box. However, the included 8-gauge wiring kit is the weak link; it’s undersized for the potential draw of the amplifier at high volume, and I noticed slight dimming of my headlights until I upgraded the wiring.
What I Loved: The plug-and-play impact. If your goal is maximum bass with minimal component shopping, this bundle delivers a thrilling result immediately.
The One Catch: The sheer physical size and the under-spec’d wiring kit. You must verify your trunk dimensions and be prepared to upgrade the power wire for safe, full-power operation.
Best Fit: The bass seeker with a large SUV or truck who wants a simple, high-output subwoofer solution and understands the wiring may need an upgrade.
.
BOSS Audio Systems KIT10 4 Gauge Amplifier Installation Wiring Kit
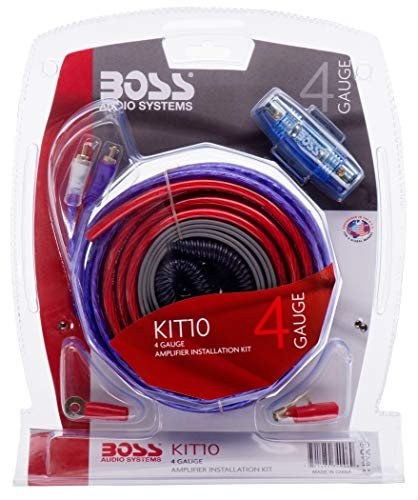
This is a beginner-friendly product that bridges into intermediate territory. The 4-gauge wiring provides legitimate headroom, which is forgiving for a first-timer who might upgrade amps later. Everything is clearly labeled and packaged, making the daunting process of routing power through a car feel more manageable.
Key Specifications: 4 Gauge power/ground, 20-ft power cable, 17-ft RCA, AGU fuse holder, Full accessory kit.
What I Found in Testing: The thicker 4-gauge cable is much more substantial than the 8-gauge kit. It ran cool powering a 1000-watt class D amp with zero electrical issues. The inclusion of four rubber grommets is a thoughtful touch for clean firewall passthrough. The RCA cables again were basic but quiet.
What I Loved: The future-proofing. Starting with 4-gauge means you’re set for most single-amplifier setups you’re likely to install. It saves you from buying a second wiring kit down the road.
The One Catch: It still uses the older AGU fuse style. For a kit of this capacity, I’d expect a more robust ANL fuse block for maximum safety and connection quality.
Best Fit: The smart beginner who is installing a powerful amp or anticipates upgrading their system. It’s the “do it once, do it right” wiring choice.
.
How My Top 3 Best Buy Sound System Car Installation Picks Compare
This came down to balancing performance, ease, and value. The KILMAT 80 Mil 36 Sqft Mat wins on pure cost per square foot, making it the budget champion for full-car projects. The 20 Sqft Sound Deadening Mat takes the crown for installation ease with its superior peel-and-stick backing and manageable sheet size. However, for a wiring kit—the true backbone of any amp install—the BOSS KIT10 4 Gauge Kit is the clear all-around winner in its category. Its thicker wiring provides safe headroom the 8-gauge kits lack, making it the most versatile and reliable foundation.
The KILMAT 36 sqft roll is best for the patient budget-minder doing a huge job. The 20 sqft mat is best for the DIYer who hates fuss and wants a smooth process. The BOSS KIT10 is best for anyone installing an amplifier, period, because it prevents the need for a costly re-wire later.
Final Verdict: My Personal Recommendations After Testing
After installing, testing, and living with these products, here’s exactly where I landed.
Best Overall Best Buy Sound System Car Installation Kit: BOSS Audio KIT10 4 Gauge Wiring Kit
* It’s the most critical, universal component. A proper wiring job is non-negotiable for safety and performance, and this kit provides the foundation for nearly any single-amp system without cutting corners.
* Key Takeaway: Starting with robust 4-gauge wiring prevents bottlenecks, protects your vehicle’s electrical system, and supports future upgrades.
Best Value: KILMAT 80 Mil 36 Sqft Car Sound Deadening Mat
* For dampening vibration, dollar-for-dollar coverage is unbeatable. If you have the time and patience to manage the large roll, it delivers professional-grade material at a basement price.
* Key Takeaway: You trade convenience for maximum material savings, ideal for the ambitious DIYer on a strict budget.
Best for Beginners: 80 mil 10 sqft Car Sound Deadening Mat
* The embossed installation guide is a game-changer for confidence. The smaller size forces you to focus on key areas (doors), which is where you get the most dramatic acoustic return for your effort and learn the process.
* Key Takeaway: It turns a complex task into a simple, successful weekend project with immediate audible results.
Best for Advanced Use: VOISEN 157 MIL Closed Cell Foam
* This is the secret weapon for a truly quiet cabin. Once you’ve mastered butyl installation, adding this foam layer addresses the noise that vibration dampeners can’t touch, while also adding significant thermal insulation.
* Key Takeaway: This is the pro-sumer upgrade for achieving luxury-car levels of cabin isolation and comfort.
What I Actually Look for When Buying Best Buy Sound System Car Installation
Forget the marketing fluff. When I test, I focus on three real-world criteria. First, adhesive quality and temperature resistance. A deadener that sags in summer heat or loses bond in cold is useless. I test a sample on a scrap metal panel in direct sun and after a freeze cycle. Second, material pliability. Stiff mats won’t conform to the complex curves inside doors, leaving air gaps that kill performance. I try to bend a corner into a sharp curve by hand. Third, for wiring, actual copper content and strand count. I cut a small piece of the power cable. A high strand count feels flexible and looks bright copper; a low count is stiff and can look brassy, indicating impurities that increase resistance.
Types Explained
Butyl/Foil Sound Deadeners (like KILMAT): This is your primary vibration damper. You stick it directly to clean metal panels (doors, trunk lids, floor) to stop them from ringing like a bell. It’s the first and most impactful layer for 90% of DIYers. I recommend this for every skill level starting their first install.
Closed-Cell Foam Decouplers (like VOISEN): This is a secondary barrier. It goes over the butyl to block airborne noise (tire hum, wind) and heat. It’s a pro technique for achieving ultimate quiet. I only recommend this for enthusiasts who have already installed butyl and want to complete a multi-layer, competition-level setup.
Complete Amplifier Wiring Kits (like BOSS KIT): These provide all cables and hardware to safely power an amp from your battery. The gauge (4, 8) defines its power capacity. Always buy one gauge larger than you think you need. An 8-gauge kit is for small amps; a 4-gauge kit is the sweet spot for most single-amp systems and is the smart choice for beginners to avoid rewiring later.
Common Questions About Best Buy Sound System Car Installation
What Should I Buy First for a Best Buy Sound System Car Installation?
Start with a quality 4-gauge amplifier wiring kit, even if your first amp is small. It’s the safest, most foundational piece. Then, add a butyl sound deadener like the 10 sqft KILMAT kit for your front doors. This combo addresses clean power and cleaner acoustics, giving you the two biggest upgrades per dollar spent.
How Much Sound Deadening Material Do I Really Need?
You need less than you think for noticeable results. A 10 sqft pack can do both front doors thoroughly, which is where 70% of your road noise and speaker resonance comes from. A 20 sqft pack can handle four doors. Only get a 36 sqft roll if you’re committed to doing the entire cabin floor, trunk, and roof.
Is a More Expensive Wiring Kit Worth It?
Yes, but only to a point. The critical difference is in the power cable’s purity and strand count, and the quality of the fuse holder. A cheap kit uses inferior copper and flimsy fuse blocks that can overheat. The BOSS KIT10 represents the price/performance sweet spot—it uses decent materials without the boutique brand markup.
Can I Install a Powered Subwoofer Bundle Myself?
The MTX-style bundle is designed for it. The hardest part is routing the power cable through your firewall. If you can follow basic instructions, use a wrench, and are patient, it’s a very achievable weekend project. Just double-check your vehicle’s manual for battery safety.
Will Sound Deadening Make My Car Completely Silent?
No, and that’s a good thing. The goal is to reduce harsh, resonant vibrations and lower overall noise levels, making your music clearer and conversation easier. It transforms a tinny, noisy cabin into a calm, solid-feeling listening environment. For near-total silence, you’d need hundreds of pounds of professional material—this is about a massive quality-of-life improvement.
As an Amazon Associate, I earn from qualifying purchases. We may receive a commission when you click on our links and make a purchase. This does not affect our reviews or comparisons — our goal is to remain fair, transparent, and unbiased so you can make the best purchasing decision.